Scope: This is the Dell WDX0R 42Wh battery install process on the Inspiron-17-5770 laptop. The same steps apply broadly to other Dell laptops that use the WDX0R battery (always confirm the part number printed on your current battery or in your system’s service manual).
At-a-Glance
- Difficulty: Easy–Moderate (20–40 minutes)
- What you’ll need: Small Phillips screwdriver, plastic pry tool (spudger), anti-static precautions
- You’ll do: Remove base cover → disconnect & remove old battery → install & reconnect new battery → reassemble
Recommended Replacement
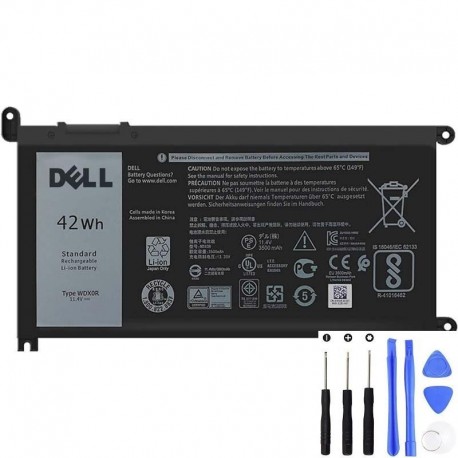
Battery Specifications (WDX0R, 42Wh)
| Type | 3-cell “smart” lithium-ion (42 Whr) |
| Voltage | 11.40 VDC |
| Dimensions | Width 184.15 mm (7.25 in) × Depth 97.15 mm (3.82 in) × Height 5.9 mm (0.23 in) |
| Weight (max) | 0.2 kg (0.44 lb) |
| Life span (approx.) | ~300 discharge/charge cycles |
| Operating temp. | 0°C to 35°C (32°F to 95°F) |
| Storage temp. | –40°C to 65°C (–40°F to 149°F) |
| Coin-cell battery | CR-2032 |
| Operating time | Varies by workload; expect shorter runtime under power-intensive use |
Safety & Preparation
- Shut down Windows completely and disconnect the AC adapter and all peripherals.
- Work on a non-conductive surface. Use an anti-static strap if you have one; otherwise touch bare metal periodically to discharge static.
- Never puncture, bend, or apply pressure to a lithium-ion battery. If the battery appears swollen or damaged, do not install it.
Step-by-Step: Remove the Base Cover (Inspiron 17 5770)
- Place the laptop upside down.
- Loosen the four captive screws on the base cover.
- Remove the following screws securing the base cover to the palm-rest/keyboard assembly:
- 1 × M2×4
- 2 × M2×2
- 7 × M2.5×7
- Starting at the top-left corner of the base, gently pry the cover free with a plastic tool.
- Lift the base cover away and set it aside.


Disconnect Power (Flea-Power Drain)
- Disconnect the battery cable from the system board.
- Press and hold the laptop’s power button for 5 seconds to drain residual power.

Remove the Old Battery
- Remove the four M2×3 screws securing the battery to the palm-rest/keyboard assembly.
- Lift the battery straight up and out of the chassis.

Install the New WDX0R Battery
- Place the new WDX0R 42Wh battery into position, aligning the screw holes and cable route.
- Reinstall the four M2×3 screws to secure the battery (snug, not overtight).
- Reconnect the battery cable to the system board, ensuring a firm, even connection.
Reassemble the Base Cover
- Set the base cover in place and press around the edges to engage the clips.
- Reinstall screws in reverse order:
- 7 × M2.5×7
- 2 × M2×2
- 1 × M2×4
- Tighten the four captive screws.
First Boot & Battery Calibration
- Connect the AC adapter and power on the laptop.
- If prompted, acknowledge any BIOS messages about battery change.
- Calibrate: Charge to 100%, keep it plugged in 30–60 minutes, then use on battery down to ~10–15% and recharge to 100% once. This helps the battery meter learn the new pack.
Care Tips for Longer Life
- Avoid sustained heat; operate between 0–35°C (32–95°F) where possible.
- For storage over a month, leave the battery around 50% charge and keep it cool (avoid hot cars).
- Expect roughly ~300 cycles as a typical lifespan before noticeable capacity loss.
Compatibility Note
This guide applies to the Inspiron 17 (5770) specifically and is generally applicable to other Dell models that use the WDX0R battery. Model layouts may vary slightly; always verify your part number and consult your model’s service manual when in doubt.
Images: Courtesy of Dell Inspiron 5770 Service Manual. All trademarks are property of their respective owners.